
I bought this house on eBay
because - well, I bid on every Deco house that appears on eBay. I
specialize in collecting Art Deco houses, but feel that it’s like saying I
collect Hope Diamonds! This one looked good and solid, and it had characteristics
that defined it as definitely Deco:

In addition there was an intriguing combination of sophistication and naivety in its construction. For example, the niche in the fireplace chimney is straight from the 1920s and an unnecessary but well done detail. But the built-in furniture in the living room was clunky and amateurish. The idea of curved banquettes is interesting and they were well built. But the side tables, nicely designed and style appropriate, were terribly executed.

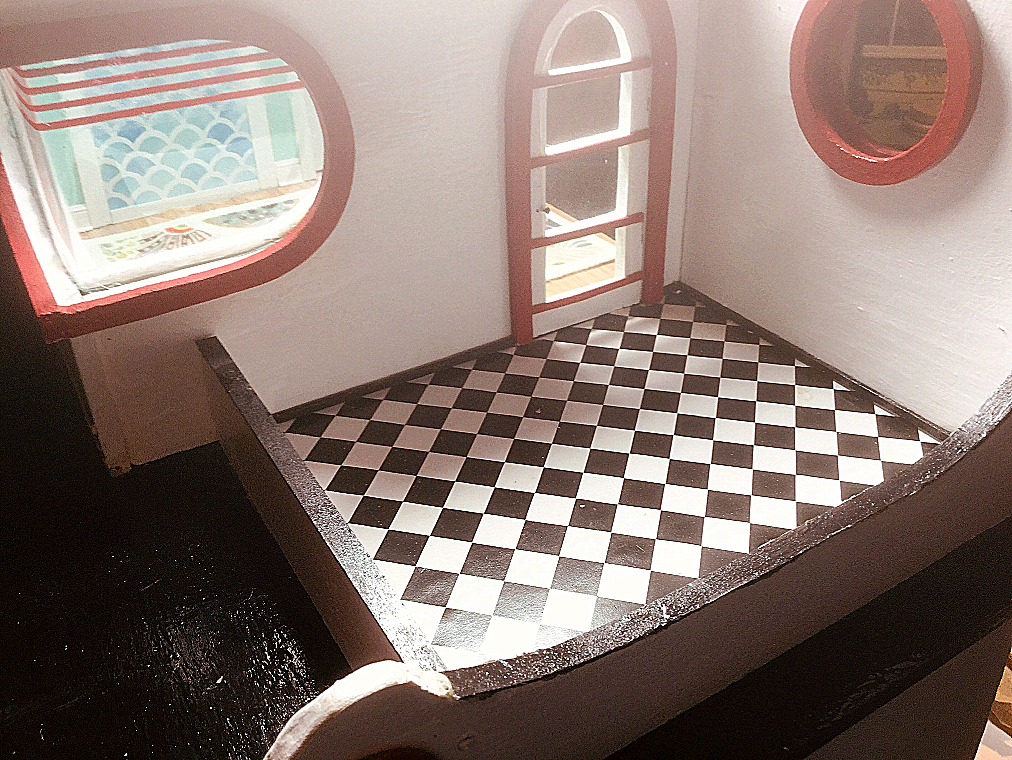
The second floor decorative wall with the circular cut-out is terrific. One can imagine
standing on the patio and looking at the well groomed estate grounds in the
back through that opening. However there is no way to utilize that
opening - there is no door nor exterior staircase to the patio.

In the same vein, the house violates my need to have a house that makes sense. As mentioned above, there is no way to get to the patio. But worse, there is no way to get to the second floor! There are no staircases - interior or exterior. There is no door on the bathroom entrance. Privacy is apparently not a consideration. There is no “glass” in most of the windows - nor had there ever been. The front door looks good - but is just a piece of wood nailed to the wall with a circular window. It does not open nor close.


I had a “demolition day” - taking off the roof, stripping the interior of wallpaper, furniture and appliances, and some layers of paint and flooring.

The bathroom had two layers of flooring in different colors.

The refrigerator and kitchen sink were kind of modern - manufactured, I believe, by some company I don’t recognize but made for young children. The stove was “dad made” and very well done except for the burners which were haphazardly incised and then filled in - badly - with paint.


With the house down to the bare walls, I decided to concentrate on the curved facade.
- I started with extremely thin wood that would bend easily. But doubling that wood and putting plastic between it made the flexibility fly right out the window.
- Then I tried white plastic sheets with holes cut in each, with clear plastic sandwiched in between them again. They were still flexible and worked, but when I wallpapered the interior section, the paper buckled and looked terrible when I put it into place. There were too many layers for the wall as a whole to curve properly.
- I thought about using oatmeal boxes. But I really didn’t want to use cardboard as I saw how the results deteriorated after passing years.
- Every now and then my brain works and I came up with a solution that seems to do the trick. I made the wall out of clear plastic and painted around the rectangle that became the window.

Kitchen

The kitchen is by far the boldest of the rooms. I wallpapered it in red stripes because it was done originally that way - though admittedly the stripes were thinner. I was going to put down a floor of real tiles but my source has stopped manufacturing them for the duration of the virus, so I painted separate wooden squares and made my own “tiles”.
The whole room is sort of circus-like, which would be more appropriate for a room from the 1940s than the sleek 30s, but I went with what was apparently the history of the room. I refurbished the stove, using bits of found hardware for the burners and replacing one of the knobs.


I bought a white “tin” ceiling on-line and used that on the ceiling. I have used this product before and it adds interest to a room - though admittedly it isn’t that readily seen.
Bathroom

The bathroom was the most fun to work on.


I bought 3 variations of green tiles and decided to go to town with creating a Deco bathroom. The circular window was the catalyst and I think dividing the tile paper around it, in half, worked out perfectly.


Window Glass


I discussed the curved windows above, but the other windows have pliable plastic “glass” - so one piece could be bent in half for the corner windows in the bedroom. They were also “printed” with white blinds on them. I had them made for a different Deco house I restored and had another set done with red blinds. I find these windows add the appropriate look for an Art Deco house, not fussy and stressing the horizontal. The windows with “blinds” worked especially well on the round bathroom window.
Living Room

As the room next door, the kitchen, was jumping out of the dollhouse with its bright red and white stripes, I decided to cool things down a bit with a very muted and calming wallpaper in the living room.


The other table originally was next to the banquette also and looked strange to me, so I cleaned it up a little and made it a focal point on the center wall. I found a green plastic ring in my stock pile of “stuff” and decided to use it as a frame for a round mirror that I had intended using in the bathroom.

The fireplace and chimney I pulled out, repainted, and made it more “usable” by doing the inside of the firebox in stone. Perceptive readers might recognize the stone wallpaper as the same I used on the “Strange Dollhouse” I wrote about in a past issue of My Vintage Dollhouses. I checked Google as to what was put into those little niches in “real life” in the 1930s and a small vase is appropriate.


On the exterior, I added surrounds too - except on the round window for the entrance door. Instead I put Decorative Deco surround pieces around the door in black and red.

I bought a very Deco carpet
on eBay and decided that that would be the object to determine the Decor and
color story in the bedroom. The rug was very busy with lots of colors and
patterns. Therefore the walls, I decided, would be a solid color so as
not to compete with the rug. I used sheets of blue paper, not
paint. But, of course, my watching too much of the House Network on TV
made me add a small section of wall in a different pattern in complementary
colors. Too contemporary? Too much going on? Yup. But I
like the result. Note the large framed picture. I used an age
appropriate tally card and made the frame. For those unfamiliar with
tally cards, they are score cards used to sum up points for the game of Bridge
and were popular in the 1920s and 30s. There are literally hundreds
(thousands?) of different pictures on the cards and some are extremely Art
Deco. Some are very reasonable (some not!) and can be found on eBay.

I bought most of the
wallpaper I used in the house from Michael’s Craft Store. I think it’s sold
mainly for people who “Scrapbook”, but also miniaturists. Buying
wallpaper on line can be so expensive and the paper I used in my house - the
checkerboard, the blue bedroom, the kitchen stripe, the bedroom focal wall -
cost something like 79 cents a sheet, a far cry from the $14+ (for 3 sheets)
you pay for miniature wallpaper. If you have access to a Michael’s and go
my route, buy more than 3 sheets per room so you won’t have to run out and buy
more when those mistakes happen!

I thought the corner window
in the room was going to be a headache what with the glass meeting at the
corner, so I put off thinking about it. But the bending of the plastic
worked right off. Problem easily solved.

Note there is now a
physical working door to both the patio and bathroom.
Patio and Exterior


I particularly like the door to the patio. It has regular mullions on it, but that would have meant I would have had to cut clear plastic to fit the window space exactly. Four times! Not these days with my old tired eyes! So I cut one piece of plastic to cover all four window spaces and then added red horizontal bars over the bigger piece of plastic. It looks good and detailed and best of all, more Deco than I could ever have hoped for.

I knew those curved walls
would be the most trouble! I was wondering how to put mullions on the
“glass”, knowing I wanted them to create horizontal and not rectangular panes.
It came to me: pinstriping vinyl (used on automobiles). I bought two
rolls in different widths in red, but I was frankly apprehensive in applying it
- what if it ruined the window? Those curved window walls were just too
hard to create to wreck them now! Maybe the tape wouldn’t stick. Maybe if
I got it on crooked, it wouldn’t come off. And I was right to be
concerned.
When I first applied the
tape, the windows looked perfect! My worries were over. Except I
didn’t know the tape would shrink and pull away leaving gaps, becoming uneven
over a few hours time. Maybe the curving of the tape caused it to stretch
and it just slowly went back to its original shape. I redid both windows,
and the tape still shrunk. So I put tape over the existing tape over and over:
well what you see is what you get. Not bad but not perfect.

Furnishings
I’ve decided to furnish the house, at least for this Article.
I have chosen period correct Miniaform and Lincoln-Wright furniture for decor, and some other manufacturers here and there. Take a look at the interiors of the house. For those who collect 1930s dollhouse furniture, there are arguably nine of the rarest pieces of manufactured 1930s furniture in the room settings.
Can you find and identify each piece? Give it a try!
Answers:
1. Patio - Strombecker Jardiniere.
2. Bedroom - Silver Miniaform Clock.
5. Bathroom - Yellow Miniaform Scale.
Very impressive indeed! Good job George!
ReplyDeleteThanks Mark! I appreciate your kind comment.
ReplyDeleteYou have done an outstanding job. I love this house. It has so many great details. Its inspiring! Great post with great photos - thanks for sharing your talents.
ReplyDeleteThanks Troy!
DeleteThe house is beautiful. When you use scrap book paper instead of miniature wallpaper, what type of glue/paste do you use to attach it to the walls?
ReplyDeleteI use a glue you find in a hardware store: liquid nails. Probably too
Deleteexpensive for the job it has to do, but I've always used it and it works.
But to tell you the truth, I've never tried proper miniature wallpaper
paste which is probably cheaper and just as good. But I'm a creature of habit. Thanks!
Thanks. Yes, I loved that rug too - but I was so nervous that the room would just be way over done and busy, but I think it came out OK. I would love to find a miniature deco carpet from the 30s, but I haven't found one yet - and I've looked for over 30 years!
ReplyDeleteWonderful. Very, very Deco. I think I helped you a bit with some of the windows.
ReplyDeleteYou certainly did JoAnn!
DeleteJoAnn reproduces missing dollhouse parts beautifully and in this case, made the clear plastic "glass" with the blinds printed on them.
Florine, you might be interested to know that in December 2020 I cited your blog in a library graduate school project, where I designed a website from scratch. My blog, The Vintage Dollhouse, was not "live," but my lecturer and classmates could poke on live links to your site, which was listed on the Resources page as being an excellent example of a dollhouse blog. :-) I received a 100% grade for the library school project and was able to direct numerous friends to your blog.
ReplyDeleteLesley!! What a compliment, and honor to me, that you would single out my blog to use as an example of a dollhouse blog for a graduate school project! I am thrilled...and also that you received a 100% grade for your work. Truly one of the nicest compliments I have ever received! Cheers to you! Florine
DeleteFlorine, you have done a beautiful job restoring this dollhouse. It looks wonderful now. I am happy to see you are still doing your blog. I have not updated mine for way too long. I never seem to have time now even though I have been self-isolating for while now.
ReplyDeleteSusan
Susan, so good hearing from you! This post was actually written by George Mundorf, who has a wonderful collection of art deco houses and who I begged to write a blog post for me! The house and refurbishing is all his work...and I love the humor in his writing.
ReplyDeleteI too have not been able to find time to do posts, so always welcome guest posts from friends....George did one for me last year also. Another friend is refurbishing a Rich Toys replica of Colleen Moore's castle and has promised to do a guest post on that.
One would think that a year of self-isolating would give us plenty of time to work on dollhouses and write new posts, but I have also found that hard to do. I've had a Hobbies dollhouse sitting on my work table since Nov and have not worked on it since then....so you are not alone in that respect.
I have missed your blog posts and I hope you get back into sharing your wonderful collection with us soon!